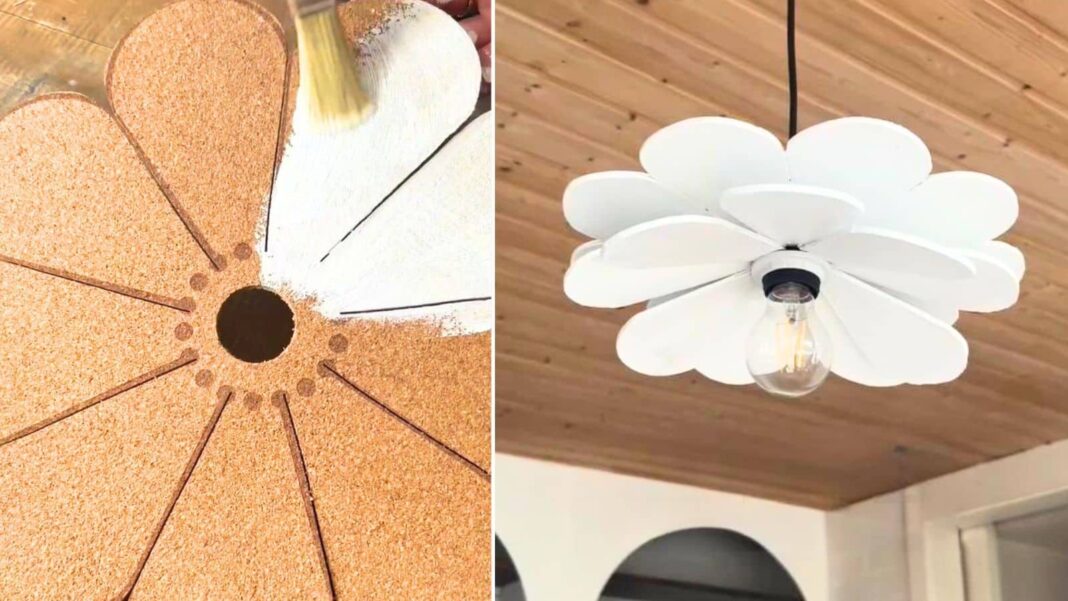
Statement light fixtures can get a little pricey, but this DIY flower lampshade gives you a whimsical, cute way to light up your space for about $30.
It also comes across as a straightforward project that won’t leave you scratching your head or trying to calculate a bunch of complicated dimensions.
Not to mention the fact that creator Marlena Schubert (@schuberts_haustagebuch) makes this hack look super easy. All it takes is a little bit of cutting and gluing, and you get a sweet hanging pendant light to show off to all your friends. Maria mentions that her husband “called her crazy” when she revealed her plan, but I have to say, it came out super cute.
The only thing is, when I went on IKEA’s site to scope out the SVARTVIDE placemats, all I found were these small SVARTVIDE coasters. The placemats were available on IKEA sites in other countries (like here). But the only corkboard mats I found on the US IKEA site were the SOLABBORRE mats. So, just worth keeping that in mind if you decide to tackle this hack.
What You’ll Need
- 2 IKEA SVARTVIDE placemats
- A pendant lamp socket kit (unless you’re planning to use an existing fixture)
- Paint (any color you choose)
- Adhesive
- Jigsaw (or sharp mat knife)
- Rotary bit and drill (optional)
DIY Flower Lampshade Made From IKEA Placemats
1. Cut the SVARTVIDE Placemats
Use a jigsaw (Marlena recommends a fine blade) to cut out the flower pattern on one placemat. If you don’t have a jigsaw, you can use a sharp mat knife, but take your time to get a nice, clean cut.
Use a rotary bit if you have one (or the mat knife) to cut out a circle in the middle of the mat the size of your socket. For the other placemat, cut out individual petals.
2. Paint the Pieces
Paint all of the pieces, both sides, whatever color you desire. Marlena painted everything white (her paint is from MissPompadour GmbH @misspompadour_de) for a fresh, clean look. But you could change the color, use several hues, add a pattern, etc.
I would imagine the corkboard loves to soak up paint, so a paint and primer combo would likely be a timesaver and limit the number of coats you need. Allow the paint to dry completely before moving on to the next step.
3. Glue Everything Together
First, glue the individual petals around the complete flower, layering the pieces slightly to create the 3D effect. Let the adhesive dry before putting the pendant on the socket kit.
4. Let There Be Light
Slide your brand-new flower shade onto an existing socket if you’re swapping out a shade. If you’re creating a completely new fixture, you’ll need to purchase a pendant lamp socket.
You can find these kits in all sorts of different styles. No matter what your design preference, you can find a socket kit to help alter the look of your DIY fixture and match it to your favorite aesthetic.
For example, maybe you want to give your flower pendant a vintage look. Perhaps you prefer to give it a more industrial edge. Note: Make sure to choose the proper bulb for the lamp kit you get.
No SVARTVIDE? No Problem
If you love this idea, but you can’t find the SVARTVIDE placemats in the States and don’t want to order internationally, don’t despair. You could purchase round corkboard plant mats online. The only pitfalls here are the size and the lack of a flower pattern laid out for you.
The only similarly priced mats I saw were 12 inches, whereas the SVARTVIDE mats are about 13.6 inches. But you could likely find some larger ones at a local home store or for a few more bucks.
As for the pattern, you would have to assess your drawing skills or find a similar pattern that you could trace onto the mat. It potentially adds a couple of extra steps, but it’s not impossible.
Watch Marlena’s flower light hack take shape, and follow Marlena Schubert @schuberts_haustagebuch for more fun IKEA hacks and DIY inspo. What do you think? Is this light fixture the bright idea you’ve been looking for in your home?
Not on the hunt for a new light fixture right now? Check out these other placemat hacks — a cork jewelry organizer, or create a placemat backsplash in a pinch.
Got an IKEA hack that you can’t wait to show off? Send it our way and you could be our next featured hack.

