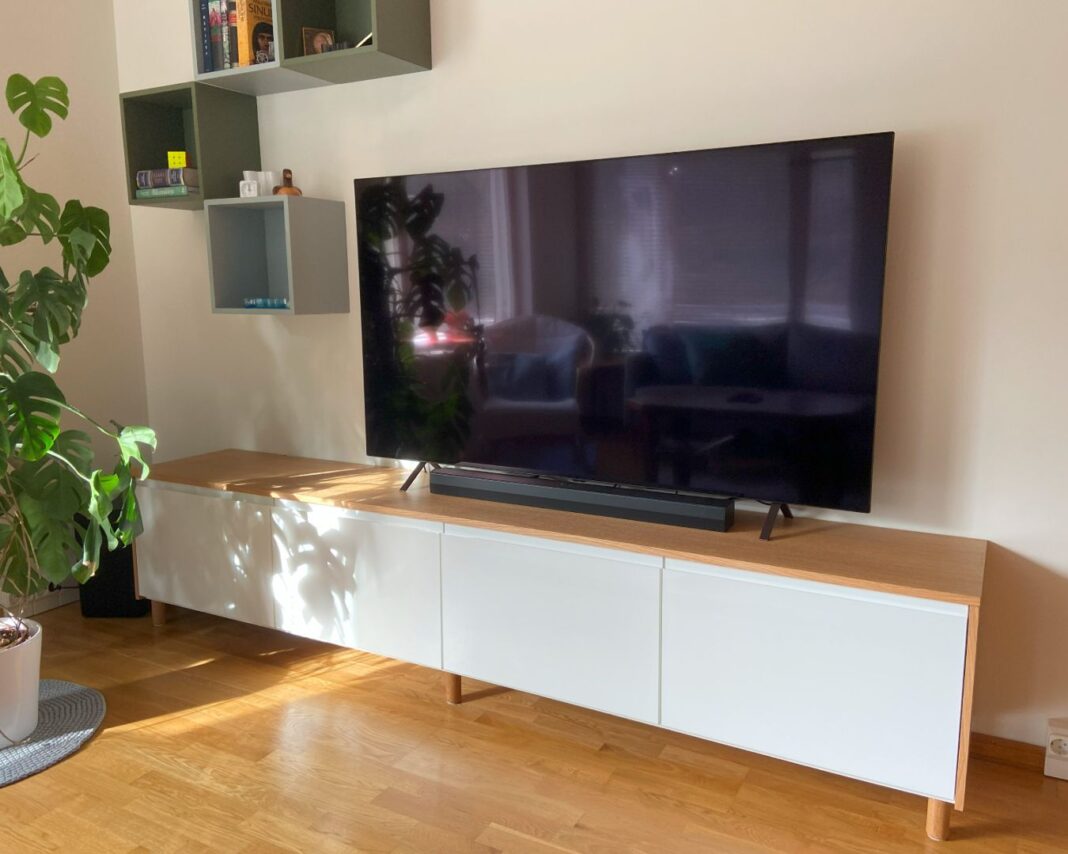
Sometimes, you just can’t seem to find the piece you want when it comes to furniture. I get this. We’ve been on the hunt for an entryway console for a white, and finding the perfect fit has been a challenge. I’m thinking we’ll ultimately end up doing what Antti Julku (from Vantaa, Finland) did and make one.
Antti was looking for a long TV cabinet for the living room and was struggling to find the right one. After seeing some of the amazing TV console hacks on IKEAhackers, they decided to shift their mindset to making a DIY cabinet.
Initially, we planned to put two 120 cm (47.25″) IKEA BESTÅ cabinets next to each other, using IKEA wooden veneer tops, but there would have been an unsightly seam between the tops,” Antti explains.
“The BESTÅ cabinets would also have required supporting legs in the center, or six legs each. This didn’t seem ideal, so we decided to build the TV cabinet using IKEA METOD kitchen cabinet parts.” (The US equivalent is the SEKTION series).
After mixing and matching several other pieces, they were able to craft the ultimate TV cabinet that gave them the length they wanted.
What You’ll Need
The list shows what Antti used. If you plan to shop at IKEA US, you’ll need to make a few adjustments. If you’re unsure about what equivalents to get, contact IKEA’s customer support for guidance.
- 4 x IKEA METOD wall cabinet frames (60 x 37 x 40 cm)
- 2 x IKEA VOXTORP drawer fronts (60 x 40 cm), high-gloss white
- 2 x IKEA VOXTORP doors (60 x 40 cm), high-gloss white
- 2 x IKEA MAXIMERA drawer boxes, high
- 2 x IKEA UTRUSTA shelf boards (60 x 37 cm)
- 2 x Two-packs IKEA UTRUSTA kitchen hinges
- Melamine particle board (2400 x 400 x 16 mm, and 2400 x 150 mm)
- Oak round molding (600 x 42 mm)
- Oak veneer particle board – for top panel (2438 x 425 x 16 mm)
- End panels (2 pieces): Oak veneer particle board (415 x 423 x 16 mm)
- Wood screws (30 mm, 50 mm)
- Clear wood wax
- Basics — Screw gun, drill, tape measure, saw
Piecing Together the Perfect Long TV Cabinet
1. Make the Legs
Make six 90 mm long legs using the round molding. Round one end for the bottom, and pre-drill a mounting hole in the other. Wax the wood with clear wood wax.
2. Build the Base
Drill holes in the 2400×400 mm melamine board (this is for the base panel) to attach the legs. Place the legs about 5 mm from the edges. Leave a little more space in the back if you need to account for baseboards.
Antti suggests cutting out a section of the base panel for power cords if needed. Screw the legs onto the base panel from the top.
3. Assemble the Frame
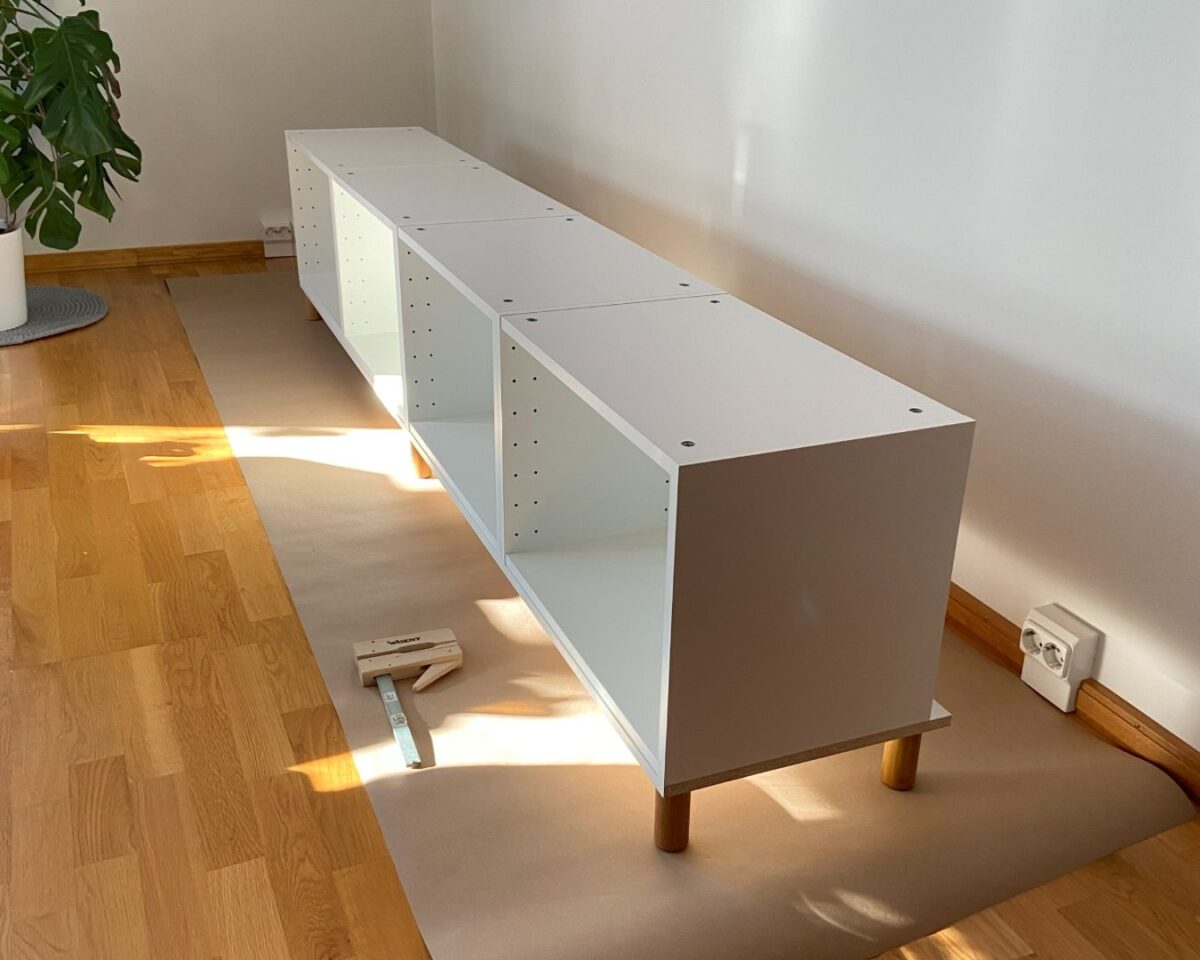
Assemble the wall cabinet frames according to IKEA’s instructions and place them upside down in a row on the floor. Position the base panel on top of the upside-down frames with the legs facing upward. Make sure to align the front edges, then screw the base panel into the sides of the cabinet frames with 50 mm wood screws.
Antti points out, “It’s a good idea to pre-drill the holes and make countersinks for the screw heads.” Attach the cabinet frames to each other from the inside using 30 mm screws.
For added stability, Antti attached a thinner particleboard strip vertically at the top of the back of the cabinet. You can also put one at the bottom and screw it in place from underneath if you feel you need more support.
4. Add the Top and End Panels
Antti ordered oak veneer boards cut to size and edgebanded for the top and end panels. Saw or router small grooves in the back of the top panel for the cables if you plan to run them directly behind the cabinet from the top.
Alternatively, you can make a small notch on top to drop the cables inside the cabinet. Then, fish them through the holes you cut in the base panel.
Attach the end panels by screwing them from the inside using 30 mm screws. Alternatively, you can use smaller screws and corner brackets at the back.
Lift the top panel onto the top of the cabinet and attach it the same way as the end panels. Give all of the veneer panels a light sanding and wax them with the wood wax.
5. Install Doors and Drawers
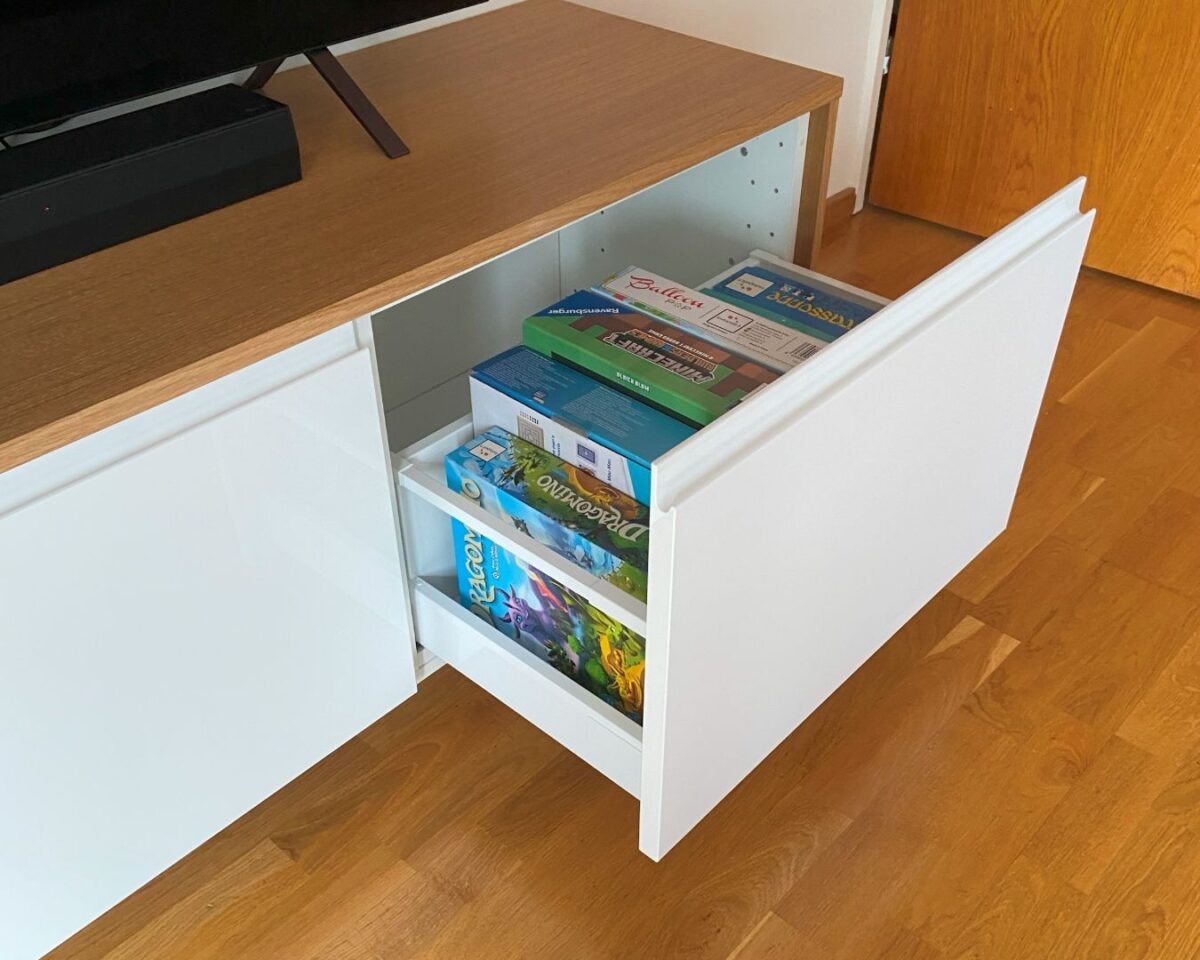
Finally, assemble the drawers according to IKEA’s instructions and install them in two of the cabinets. Install doors using the hinges on the other two cabinets and place the UTRUSTA shelves where you prefer.
What Is the Final Size of This TV Cabinet?
Since the main springboard for this hack was the need for a long TV cabinet, just how long is this piece? The finished length of this sleek TV console is 96 inches. It’s just under 17 inches deep and a little over 20 1/2 inches tall. It offers tons of closed storage and ample surface space.
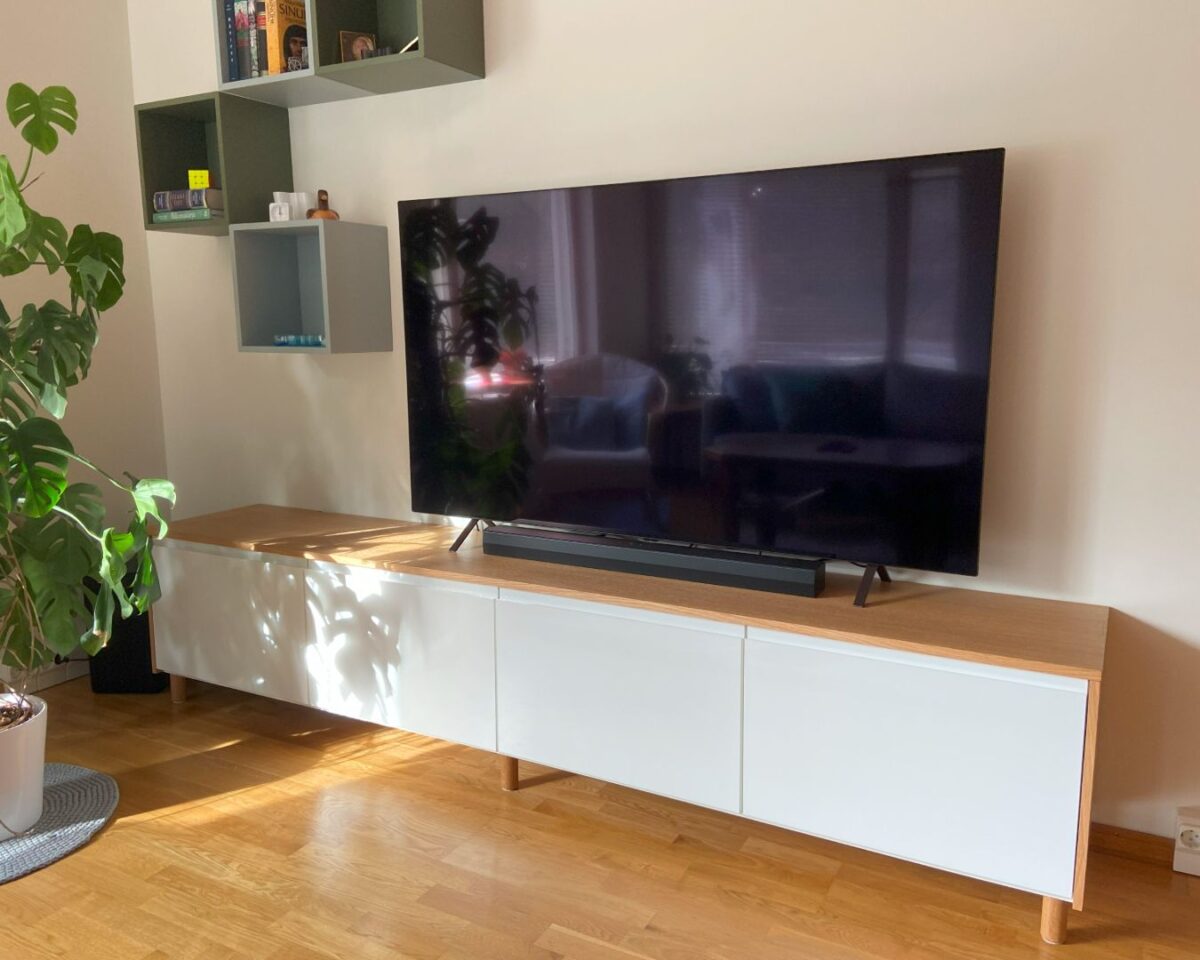
If you’re looking for some inspiration to create a long TV cabinet, this hack definitely provides plenty. You’ll have to do a bit of mathematical gymnastics to find the right matches size-wise if you’re ordering from a US-based IKEA, but a good start is the SEKTION series. Look for doors and drawer fronts that IKEA recommends for those particular frames.
Here’s another hack that gives you a similar long TV cabinet, or if you need the opposite, check out this BESTA hack for a tight fit. What do you think? Is this the answer to your TV troubles, or do you have your own solution to share? We’d love to feature it!

